Purpose and objective:
To mount a large telephoto lens on a motor-driven equatorial mount, for
long-exposure astrophotography.
Specifications:
Mount mfg: Meade
Mount model number: LXD300, with accessory RA motor
Lens Mfg.: Canon
Aperture 150mm (6 in.)
Focal length: 400mm
Focal Ratio: 2.8
Focuser: Internal ultrasonic motor
Weight: 6,100 grams
Parts required:
Overview:
Granted temporary access to large telephoto lenses, we anticipated
astrophotographic use. The lenses available are a 300mm f/2.8, a 400mm f/2.8
and a 600mm f/4, and are used for sports photography. These deliver
magnifications of approximately 6x, 8x and 12x at prime focus, full-frame
35mm. A matched doubler gives the lenses twice the focal length at a loss
of two f-stops.
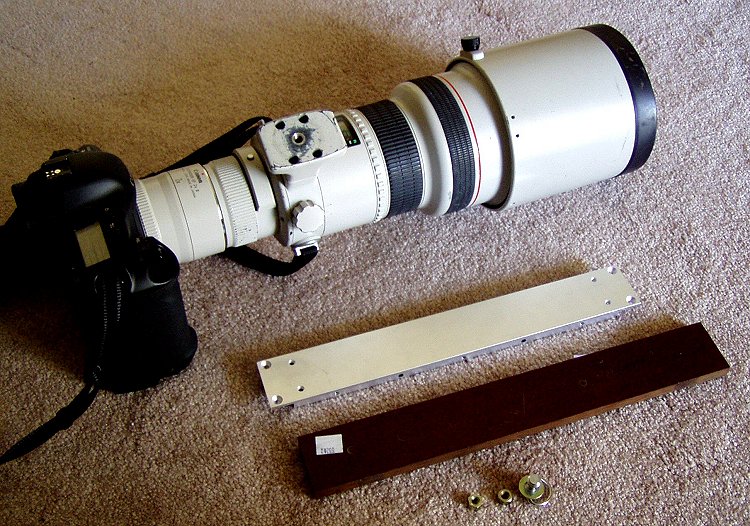
Tripod-mounted, short-exposure images look promising, but even 5-second exposures showed trailing. With our attempts to photograph nebulae by piggyback on a goto scope more often failing, the next step was to mount it on a motorized EQ, and reduce driven weight by removing the telescope tube. In order to securely attach the telephoto lens/camera combination to the eq mount, an adapter plate has to be made.
Procedure:
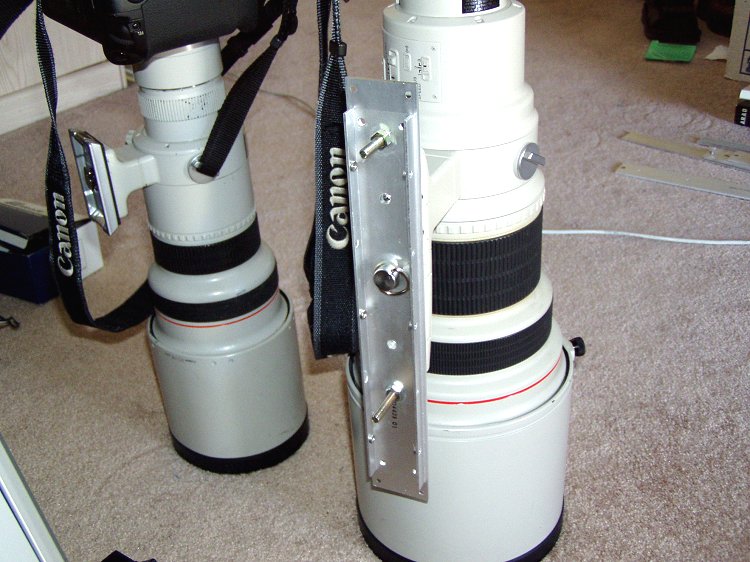
Locating a piece of material suitable for such a plate turned out to be
difficult. But a visit to the recycling plant turned up several candidates.
Here are the two finalists.
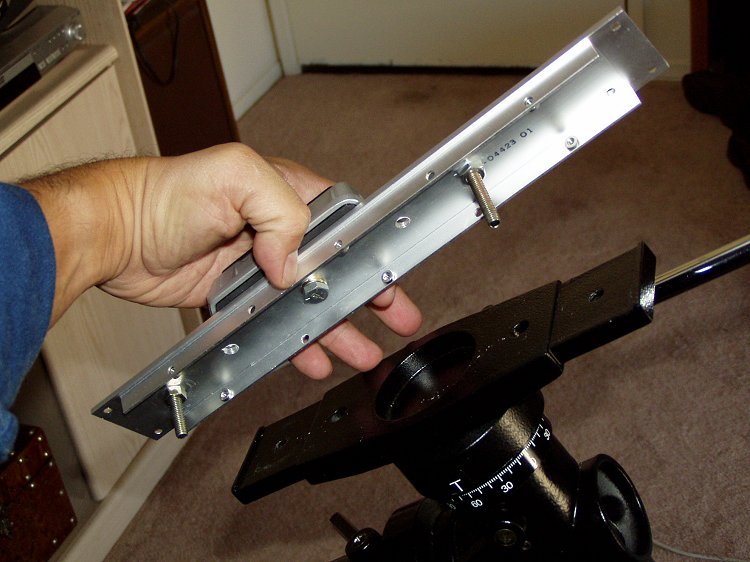
The aluminum bar is actually a nice piece of cnc machined channel, found in the recycling yard. I identified it as coming from this switch, [metaswitch.com] may it rest in piece. The brown bar appears to be epoxy insulator, approximately 3/8" thick. The aluminum was selected because its channel configuration would make a more efficient design.
Two holes needed to be drilled, to mate the Meade mounting plate. Though the holes need to be drilled rather precisely, it can be done with hand tools.
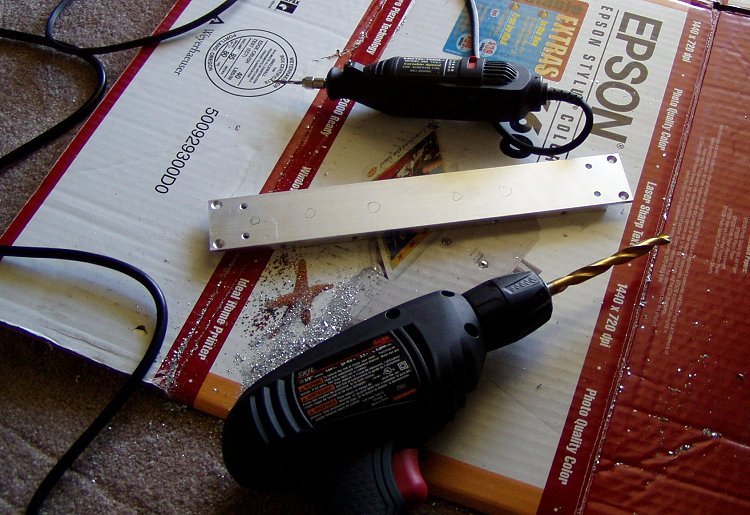
The tools used were:
The Meade mounting plate holes were traced very carefully, using a mechanical pencil.The pin punch was used to get precise centering on the holes. The tolerance needs to be within 1/16 inch. Then, the Dremel tool was used to open the pin punch hole and make a starter hole for the full-size drill. This step can be omitted if your hand drill has a self-centering drillbit. Then, the hole was finished with the hand drill. I made five holes, to accomodate future compatibility.
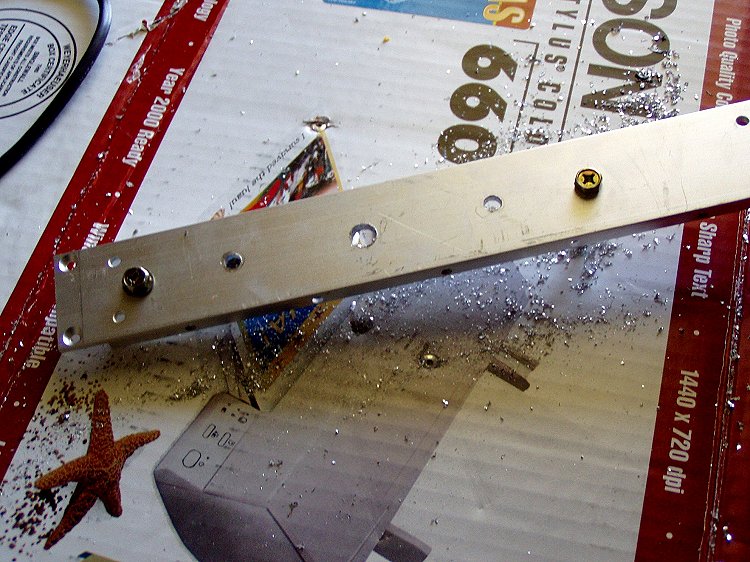
The two holes on the end are used to mount the plate to the Meade mount. The center hole accepts the lens tripod screw.
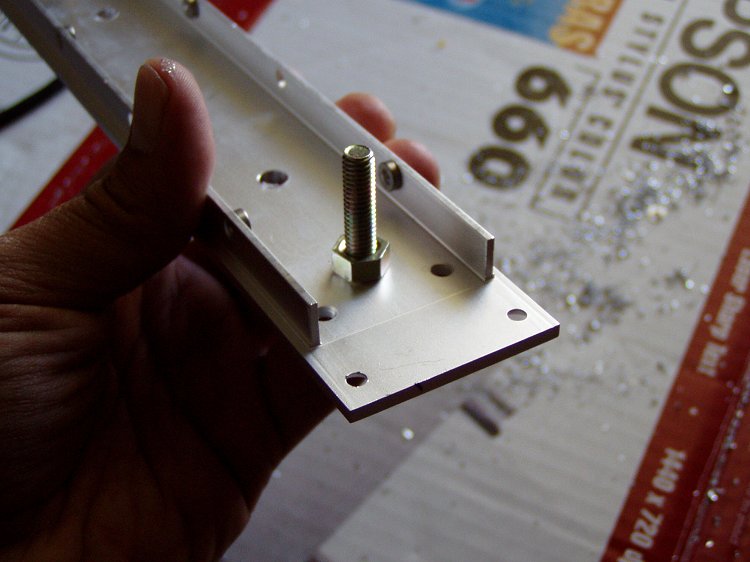
The channel allows space for the mounting bolts to be held in stud fashion. It also permits the use of a common wingnut for the lens. This makes the plate very easy to take on and off.
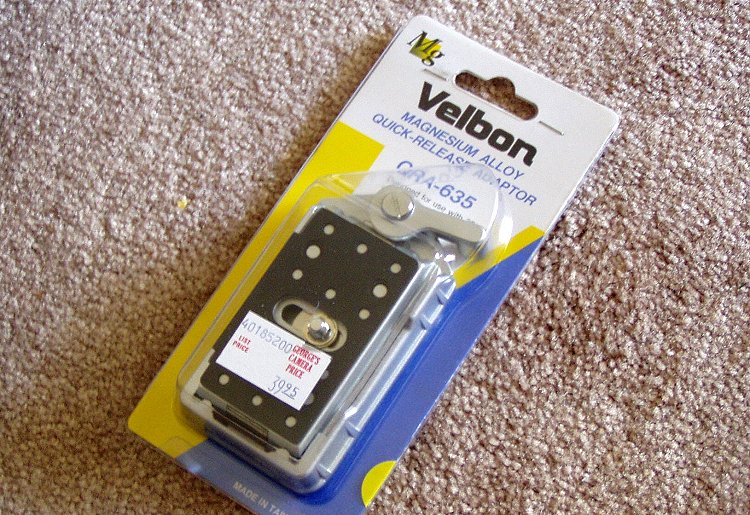
The 300mm lens requires additional spacing in order to allow the camera body to rotate. This quick-release plate adds 3/4 inch in height. It is not required for larger lenses.
The adapter plate is now dropped onto the mount.
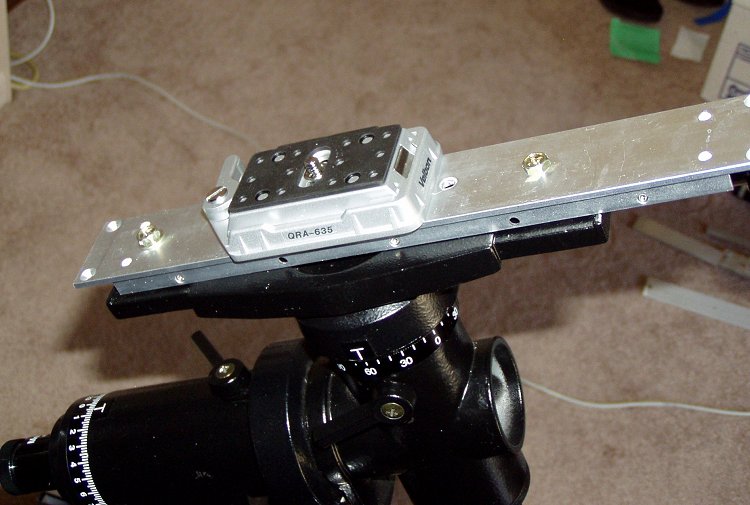
The bolts are secured from underneath and the assembly is held very securely.
Closeup of the 300mm, with doubler, mounted.

The 300mm, with doubler, mounted.
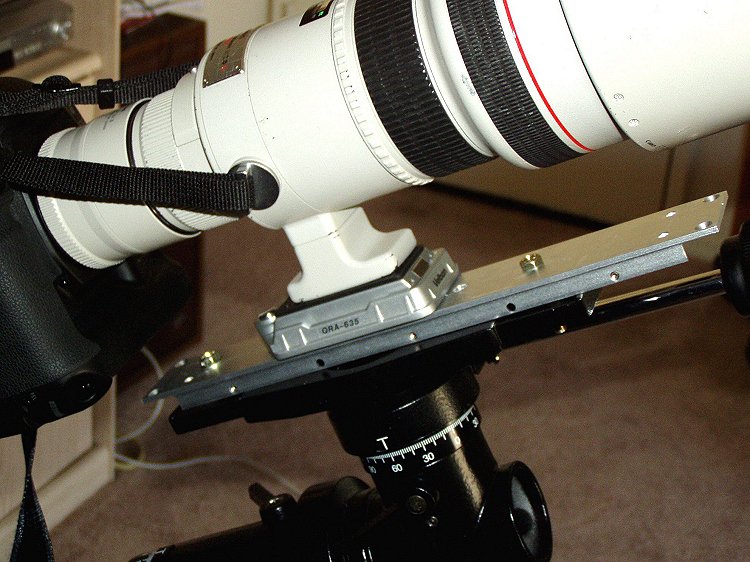
The 400mm can be held without the quick-release plate.
Results:
The mount held the 16-17 pound assembly tightly even at zenithal
positions. Some slippage was observed when trying to push along the RA axis.
A piece of sheet rubber, placed between the adapter and the lens mount, solved
the slippage.
The completed assembly was taken to the Sunrise Highway observing location near San Diego. Several clusters and other targets suitable for exposures in the 30-second range were photographed on the morning of 25 APR 2003.